How to Install Grease Trap – Grease Trap Installation Guide
Installing a grease trap is crucial for managing waste and preventing plumbing clogs.
Whether you’re a homeowner or a business owner, a grease trap helps intercept fats, oils, and grease (FOG) to prevent sewer blockages.
In this guide, we’ll take you through the grease trap installation process, ensuring your plumbing stays clean and efficient.
How to Install a Grease Trap?
Installing a grease trap involves digging a hole, connecting the inlet and outlet pipes, placing the trap in the hole, and sealing it. It’s crucial to ensure proper plumbing alignment for efficiency.
Key Takeaways
- Grease traps are important for preventing blockages caused by fats, oils, and grease in plumbing systems.
- Installing a grease trap requires proper planning, tools, and knowledge of local regulations.
- Regular maintenance is needed to ensure the grease trap functions efficiently and prevents backups.
What Is a Grease Trap and Why Do You Need One?
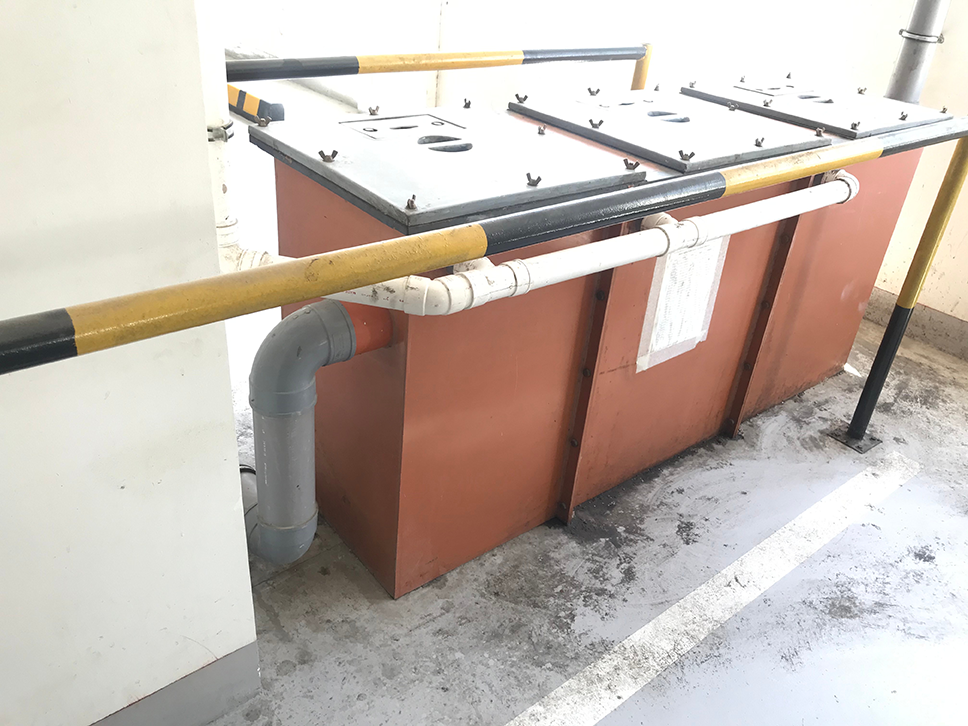
A grease trap, also known as a grease interceptor, is a plumbing device designed to capture and separate grease, oil, and food solids from wastewater before they enter the sewer or septic system.
Installing a grease trap in your kitchen or business is an important step in managing waste and preventing clogging in plumbing systems.
Grease traps are essential for intercepting fats, oils, and grease (FOG) that are commonly washed down sinks, preventing them from entering sewer systems and causing blockages. Regular grease trap maintenance in Miramar ensures these systems function efficiently, helping local businesses stay compliant with environmental regulations and avoid costly plumbing issues.
Whether you’re a homeowner adding one to your kitchen or a business owner, knowing how to properly install a grease trap is crucial. Pair that with regular grease trap cleaning Aventura services, and you’ll keep your plumbing system running clean and hassle-free.
We will walk you through the steps to install a grease trap and help ensure your system works efficiently.
These devices are commonly used in commercial kitchens, restaurants, and food processing facilities, but they are also beneficial for residential kitchens, particularly if large amounts of grease are washed down the sink regularly.
The need for grease traps arises from the fact that FOG can cause major blockages in plumbing systems, which is why regular grease trap maintenance in Key Biscayne is so important to keep everything flowing smoothly.
When grease enters the sewer, it cools and solidifies, leading to clogged pipes and potential backups.
Understanding how to dispose of grease from grease trap ensures captured grease never reaches your pipes, preventing blockages and preserving the overall integrity of your plumbing system.
Types of Grease Traps
Before proceeding with the installation process, it’s important to understand the different types of grease traps available. To make an informed choice, it also helps to explain grease interceptor systems, which are commonly used in commercial kitchens to manage fats, oils, and grease efficiently.
The type of trap you choose will depend on your operation’s size, how much grease it produces, and the space available for installation. It’s also important to consider what could occur if a grease trap isn’t properly maintained, as neglecting upkeep can lead to serious issues regardless of the model you select.
1. Passive Grease Traps
Passive grease traps are the most common type used in residential kitchens. They rely on gravity to separate the grease from wastewater.
As wastewater flows through the trap, grease floats to the top, and solids sink to the bottom. The separated grease is collected in a container, which can be easily cleaned.
Best for: Small to medium kitchens or homes with moderate grease production.
2. Automatic Grease Traps
Automatic grease traps are typically used in larger commercial kitchens. These traps use mechanical devices to separate grease and solids from wastewater.
They are more efficient than passive traps and require less manual maintenance and cleaning. Some models even have automated systems that pump out the accumulated grease.
Best for: Larger businesses or high-volume kitchens with high grease production.
3. Hydromechanical Grease Interceptors
These are used for higher volumes of wastewater and are designed to capture and separate grease from water in commercial kitchens.
If you’re wondering what is a hydromechanical grease interceptor?, it’s a device specifically engineered for this purpose, offering an efficient solution to manage grease-laden wastewater in such environments.
They rely on a combination of gravity and mechanical elements such as baffles, filters, and flow regulators to provide more efficient separation.
Best for: Commercial kitchens with heavy grease usage.
Tools and Materials You’ll Need
Before beginning the installation, make sure you have the following tools and materials ready:
- Grease trap or interceptor (appropriate size for your needs)
- Pipe wrenches
- PVC pipes and fittings
- Teflon tape
- Silicone sealant
- Screwdriver
- Level
- Drill
- Pipe cutter
- Shovel (for digging if installing an underground trap)
- Safety gloves and goggles
Step-by-Step Guide to Installing a Grease Trap

Step 1: Plan the Installation Location
The first step in installing a grease trap is to choose the right location.
Ideally, the grease trap should be installed as close to the source of grease generation (e.g., the sink or dishwashing area) as possible.
The trap should also be placed where it’s easily accessible for maintenance.
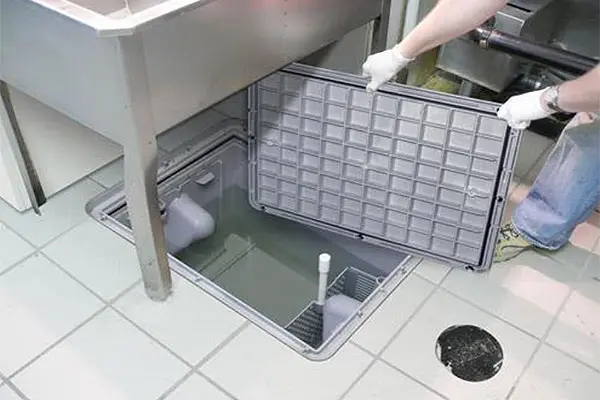
For residential kitchens: Install the grease trap under the sink, where it can collect grease before it enters the drain.
For commercial kitchens: If you are installing an underground grease trap, it should be located outside, where it can easily intercept wastewater before it enters the sewer system.
Step 2: Prepare the Area for Installation
Once you’ve selected the installation site, clear the area of any obstacles.
If you’re installing a grease trap under the sink, disconnect the sink’s plumbing and prepare the space to accommodate the trap.
For underground traps, you may need to dig a hole large enough to fit the trap and connect the pipes.
Step 3: Install the Grease Trap
Now, it’s time to install the grease trap. Begin by connecting the inlet and outlet pipes to the trap.
Ensure that the inlet pipe, which carries wastewater from the sink or dishwasher, is connected to the grease trap’s inlet, and the outlet pipe, which carries treated water away from the trap, is connected to the drain.
For under-sink installation: You may need to use PVC pipe to connect the inlet and outlet to the appropriate drain lines.
Use pipe wrenches to tighten all connections securely, and apply Teflon tape to ensure a watertight seal.
For underground installation: Once the trap is positioned in the hole, connect the pipes to the inlet and outlet as per the manufacturer’s instructions. Make sure the trap is level to ensure proper flow.
Step 4: Seal the Trap and Check for Leaks
After securing the pipes, use silicone sealant around the edges of the trap to ensure it is watertight.
Allow the sealant to cure according to the manufacturer’s instructions. Once the trap is sealed, check all connections for leaks by running water through the system.
If you find any leaks, tighten the connections and apply more sealant as needed.
Step 5: Test the System
Once everything is in place, test the system by running water through the sink or drain.
Check the trap to ensure it’s collecting grease effectively and that the water is flowing through the system without any blockages. Make sure there’s no overflow or leakage around the trap.
How to Maintain Your Grease Trap

Regular grease trap maintenance is essential to keep your grease trap functioning properly. Here are some tips to ensure that your trap continues to work efficiently:
1. Clean the Trap Regularly
Depending on how much grease your kitchen produces, you should clean the trap every few weeks to a few months.
This involves removing the accumulated grease from the trap and disposing of it properly. If you have a residential and commercial kitchen, you may need to clean the trap more often.
2. Check for Blockages
Inspect the pipes and baffles inside the grease trap to ensure that they are not blocked. Clean out any debris or grease build-up that might cause a clog.
3. Schedule Professional Inspections
If you have a commercial grease trap, it’s advisable to schedule regular professional inspections.
A technician can check for signs of wear, clean hard-to-reach areas, and ensure that the trap is functioning as it should.
Frequently Asked Questions
1. How often should I clean my grease trap?
It’s recommended to clean your grease trap every 3 to 6 months, depending on usage. In commercial kitchens, it may need to be cleaned more frequently.
2. Can I install a grease trap myself?
Yes, you can install a grease trap yourself if you have basic plumbing knowledge. However, for larger installations or complex systems, it’s best to consult with a professional plumber.
3. What happens if my grease trap is not maintained?
If not maintained, a grease trap can become clogged, leading to blockages in the plumbing, bad odors, and potential backups. Regular cleaning is essential to avoid these issues.
Conclusion
Installing a grease trap in your home or business is an essential step in preventing grease and fats from entering the plumbing system.
By following the proper steps for installation and maintenance, you can ensure that your grease trap functions effectively and protects your plumbing from damage.
Whether you opt for a DIY installation or hire a professional, understanding the process and knowing how to maintain your grease trap will help keep your drainage system in top shape.